Online Gurukul - हमारा उद्देश्य शिक्षित पूरा देश

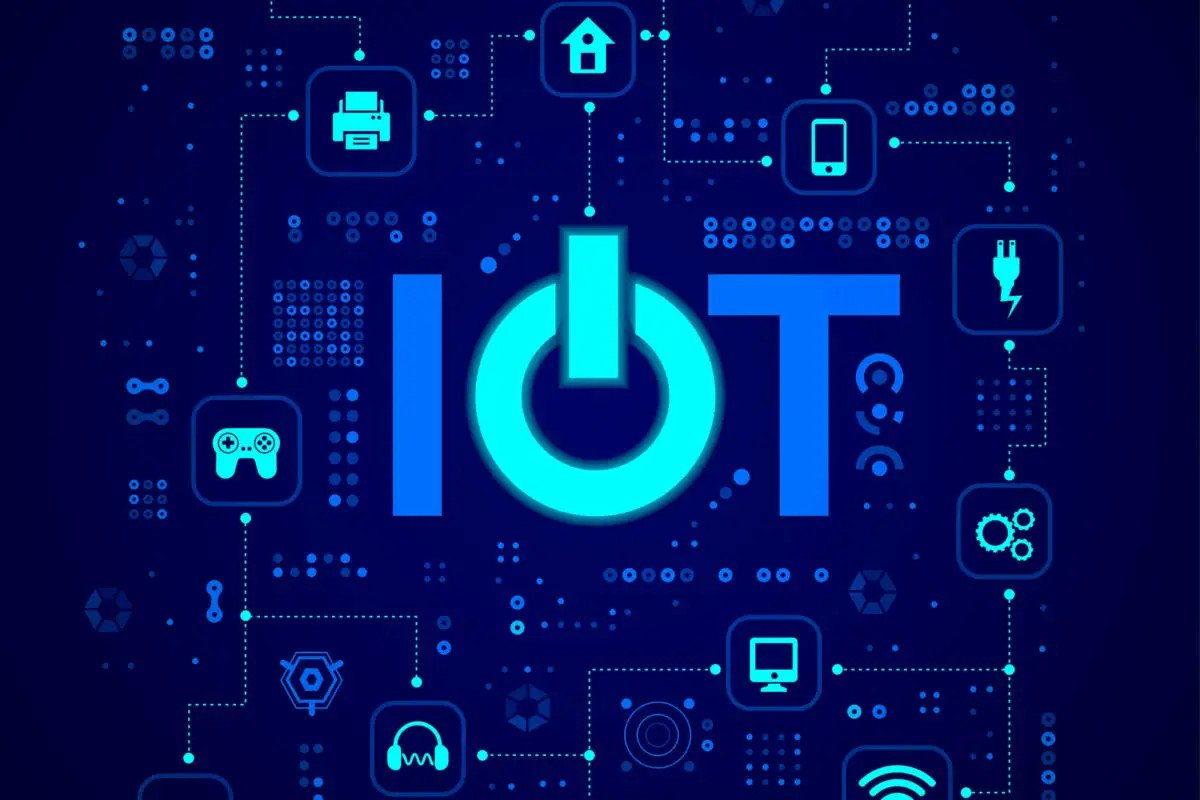
The Internet of Things (IoT) is a network of physical objects, devices, vehicles, buildings, and other items that are embedded with electronics, software, sensors, and connectivity that allow them to collect and exchange data. The concept of IoT is to connect everyday objects to the internet and enable them to communicate with each other and with humans. The IoT is an emerging technology that is transforming the way we live and work. With IoT, devices can communicate with each other and automate tasks without human intervention. For example, a smart thermostat can automatically adjust the temperature based on your preferences and the weather outside. Similarly, a smart refrigerator can order groceries when you're running low on supplies. IoT devices can be connected to each other and to the internet using a range of communication technologies, including Wi-Fi, Bluetooth, cellular networks, and satellite. The data collected by these devices can be analyzed to provide insights that can be used to optimize processes, reduce costs, and improve efficiency. However, the IoT also presents challenges, including security risks and privacy concerns. As more devices are connected to the internet, there is a greater risk of cyber attacks and data breaches. It is important to ensure that IoT devices are secure and that they protect the privacy of individuals. Overall, the IoT has the potential to transform the way we live and work, and it is an area of rapid innovation and growth. As more devices become connected, we can expect to see new use cases and applications that will further enhance the benefits of this technology.

Price ₹ 999.00
₹ 499.00

Buy Now Add To Cart

Course Demo


Course Timeline:
NodeMCU is an open-source firmware and development kit that is designed for Internet of Things (IoT) applications. It is based on the ESP8266 Wi-Fi module, which is a low-cost Wi-Fi chip with full TCP/IP stack and microcontroller capabilities. NodeMCU allows developers to easily create IoT applications without having to deal with the low-level details of the ESP8266 chip. It is programmed using the Lua scripting language, which is easy to learn and allows for quick prototyping of IoT applications. NodeMCU boards usually come in a compact form factor and have a number of input/output (I/O) pins that can be used to connect to sensors, actuators, and other electronic components. They can be programmed using a USB cable and the NodeMCU flasher tool, which is available for Windows, Mac, and Linux. NodeMCU has a large and active community of developers who contribute to its development and provide support through forums and online resources. The popularity of NodeMCU has led to the development of many third-party libraries and tools, which makes it easier to develop complex IoT applications.
The Internet of Things (IoT) refers to the interconnected network of physical devices, vehicles, buildings, and other objects that are embedded with sensors, software, and network connectivity, enabling them to collect and exchange data. IoT devices can range from simple sensors that detect temperature, humidity, or light levels, to complex systems such as smart homes or self-driving cars. The data collected by IoT devices can be used to improve efficiency, optimize processes, and enhance user experience. IoT technology has a wide range of applications across industries, including healthcare, transportation, manufacturing, and agriculture. With the increasing adoption of IoT, it is expected to revolutionize the way we live and work, creating new opportunities and challenges for businesses and individuals alike.
Certainly! Here is some information about courses and products related to IoT: Courses: Introduction to IoT: This is a beginner-level course that covers the basics of IoT, including hardware and software components, connectivity protocols, and data management. IoT Security: This course focuses on the security aspects of IoT, including authentication, encryption, and device management. IoT Analytics: This course teaches how to analyze and derive insights from the data collected by IoT devices, using tools such as machine learning and data visualization. Industrial IoT: This course covers the specific applications of IoT in the industrial sector, such as predictive maintenance, asset tracking, and supply chain management. Products: Smart Home Devices: These include devices such as smart thermostats, smart lighting, and smart locks that can be controlled remotely using a smartphone app or voice commands. Wearables: These are IoT devices that can be worn on the body, such as fitness trackers, smartwatches, and medical monitoring devices. Industrial IoT Solutions: These include sensors, software, and hardware that are designed for specific industrial applications, such as asset tracking, predictive maintenance, and quality control. Connected Cars: These are cars that are equipped with IoT sensors and connectivity features, enabling features such as remote start, location tracking, and predictive maintenance. There are many other courses and products related to IoT, but these are just a few examples to give you an idea.
The process of installation and uploading code for an IoT device can vary depending on the specific device and development platform being used. However, here are some general steps that can be followed: Choose the development platform: There are many development platforms available for IoT, such as Arduino, Raspberry Pi, and Particle. Choose a platform that is compatible with your device and that you are comfortable working with. Install the development environment: Install the necessary software and tools required for the development platform. For example, if you are using Arduino, you will need to install the Arduino IDE. Connect the device to your computer: Connect the IoT device to your computer using a USB cable or other appropriate interface. Write the code: Write the code for your IoT device using the appropriate programming language and tools. Make sure to test your code thoroughly before uploading it to the device. Upload the code: Once you have written and tested your code, upload it to the device using the appropriate tools and commands. For example, if you are using Arduino, you can upload the code using the Arduino IDE. Monitor the device: Monitor the device to make sure that it is functioning as expected. You may need to adjust the code and re-upload it if there are any issues. These are general steps, and the specific process can vary depending on the device and development platform being used. It is important to follow the instructions and guidelines provided by the manufacturer or developer of the device and platform.
Blinking an LED is a basic project in the world of electronics and a common first step in learning about IoT devices. Here are the general steps for blinking an LED: Gather materials: You will need an LED, a resistor (to limit the current), a breadboard (or other circuit board), and wires. Set up the circuit: Connect the anode (positive leg) of the LED to a digital pin on your IoT device and connect the cathode (negative leg) of the LED to ground through a resistor. The resistor value will depend on the specific LED being used and the power supply voltage. Write the code: In the programming environment for your IoT device, write code that turns the digital pin on and off, with a delay in between to create the blinking effect. For example, in the Arduino IDE, you can use the "digitalWrite" function to set the pin high or low, and the "delay" function to pause between changes. Upload the code: Upload the code to the IoT device using the appropriate tools and commands. Test the circuit: With the code uploaded and the circuit connected, the LED should blink on and off at the rate specified in the code. If it does not work, double-check the wiring and the code for any errors. Once you have successfully blinked an LED, you can experiment with different patterns, speeds, and colors. This basic project is a great starting point for learning about the capabilities of IoT devices and their programming languages.
Serial communication is a method of transmitting data between two devices, using a single data line. In IoT devices, serial communication is often used to exchange data between a microcontroller (such as an Arduino or Raspberry Pi) and another device, such as a sensor or a computer. Here are some general steps for implementing serial communication in an IoT project: Choose the communication protocol: There are several protocols that can be used for serial communication, such as UART, SPI, and I2C. Choose a protocol that is compatible with both devices and that meets the requirements of your project. Set up the hardware: Connect the data line (or lines) between the two devices, using appropriate hardware such as serial cables, USB-to-serial converters, or TTL converters. Configure the devices: Set up the devices to communicate using the chosen protocol. This may involve configuring the baud rate (the speed at which data is transmitted), the data format (such as the number of bits per byte), and any other relevant parameters. Write the code: In the programming environment for your IoT device, write code that sends and receives data using the serial communication protocol. This may involve sending commands or queries to the other device, receiving data from the other device, and processing the data in the microcontroller. Test the communication: With the code uploaded and the hardware connected, test the serial communication to make sure that data is being transmitted and received correctly. You may need to use a serial monitor or other debugging tools to monitor the data being transmitted. Serial communication is a powerful tool for exchanging data between IoT devices and other devices, and it can be used in a wide range of applications, such as sensor networks, robotics, and automation.
To connect to a WiFi network, follow these steps: Turn on your device's WiFi: Make sure the WiFi is turned on on your device. This can usually be done by going to the Settings app on your device and selecting the WiFi option. Select a WiFi network: Once you've turned on your WiFi, your device should automatically scan for available WiFi networks. Select the network you want to connect to from the list of available networks. Enter the WiFi password: If the network is password-protected, you'll need to enter the password to connect to it. Make sure you enter the password correctly, as it's case-sensitive. Connect to the network: After you've entered the password, your device should connect to the WiFi network automatically. If the connection is successful, you'll see a message confirming that you're connected to the network. Test the connection: Once you're connected to the network, you should test the connection to make sure it's working properly. Try opening a web page or using an app that requires an internet connection to make sure everything is working as expected.
Blynk is a platform that allows you to build mobile and web applications for the Internet of Things (IoT) devices. To configure Blynk for your project, follow these steps: Create a Blynk account: If you haven't already done so, create a Blynk account by visiting their website and registering for an account. Create a new Blynk project: Once you've logged in to your Blynk account, create a new project by clicking on the "New Project" button. Give your project a name and select the hardware that you'll be using for your project. Get your Blynk authorization token: In order to communicate with Blynk servers, you'll need an authorization token. You can get this token by clicking on the "Device Info" button in the Blynk app and copying the token that's displayed. Configure your hardware: Next, configure your hardware to communicate with Blynk servers. This will involve programming your hardware to connect to the internet and to send and receive data using the Blynk API. Blynk provides libraries and examples for a variety of hardware platforms, including Arduino, Raspberry Pi, and ESP8266. Create widgets: Once you've configured your hardware, you can create widgets in the Blynk app to control your devices or display sensor data. Widgets can include buttons, sliders, graphs, and displays. Test your project: Finally, test your project to make sure everything is working as expected. Use the widgets you created to control your devices or display sensor data. If you encounter any issues, check your hardware configuration and code to make sure everything is correct.
To use Blynk, follow these steps: Open the Blynk app: Start by opening the Blynk app on your mobile device. If you haven't already done so, log in to your Blynk account. Select your project: After logging in, select the project you want to work on from the list of available projects. Use widgets: Once you've selected your project, you'll see a screen with a variety of widgets that you can use to control your devices or display sensor data. Widgets can include buttons, sliders, graphs, and displays. Simply tap on a widget to use it. Control your devices: If you're using Blynk to control devices, you can use widgets like buttons or sliders to send commands to your devices. For example, you could use a button widget to turn on a light or a slider widget to control the speed of a motor. Display sensor data: If you're using Blynk to display sensor data, you can use widgets like graphs or displays to show the data. For example, you could use a graph widget to display temperature readings or a display widget to show the current status of a sensor. Test your project: Finally, test your project to make sure everything is working as expected. Use the widgets you created to control your devices or display sensor data. If you encounter any issues, check your hardware configuration and code to make sure everything is correct.
To create a motion sensor and blinking LED project, follow these steps: Gather your materials: You'll need a motion sensor, an LED, a breadboard, and some jumper wires. Connect the motion sensor: Connect the motion sensor to your microcontroller (such as an Arduino) using jumper wires. The motion sensor will have a VCC, GND, and OUT pin. Connect the VCC pin to 5V on your microcontroller, the GND pin to GND on your microcontroller, and the OUT pin to a digital pin on your microcontroller (such as pin 2). Connect the LED: Connect the LED to your microcontroller using jumper wires. Connect the anode (positive leg) of the LED to pin 13 on your microcontroller and the cathode (negative leg) to GND on your microcontroller. Write the code: Write a program for your microcontroller that will detect motion using the motion sensor and turn on the LED if motion is detected. Upload the code: Upload the code to your microcontroller using a USB cable. Test the project: Test your project by moving in front of the motion sensor. If the sensor detects motion, the LED should blink for 1 second. If the LED does not blink, check your wiring and code to make sure everything is correct.
A Passive Infrared (PIR) sensor is a type of motion sensor that detects changes in infrared radiation in its environment. PIR sensors work by detecting the movement of objects that emit or reflect infrared radiation, such as human beings or animals. The basic working principle of a PIR sensor is as follows: The PIR sensor consists of a pyroelectric sensor, which is made up of a crystalline material that generates an electric charge when exposed to infrared radiation. The sensor is divided into two halves, each with a special lens that focuses the infrared radiation onto the pyroelectric sensor. When an object moves within the field of view of the PIR sensor, it emits or reflects infrared radiation that is detected by the pyroelectric sensor. The sensor generates an electric charge, which is amplified and processed by the circuitry in the PIR sensor. The circuitry then sends a signal to the microcontroller or other device that is connected to the PIR sensor. The microcontroller or other device can then take appropriate action, such as turning on a light or sounding an alarm. PIR sensors are commonly used in security systems, lighting control systems, and other applications where it is important to detect motion. They are a popular choice for these applications because they are inexpensive, easy to use, and reliable.
Assembling a relay with a PIR (Passive Infrared) sensor allows you to control electrical appliances such as lights or fans based on the detection of motion. Here are the steps to assemble a relay with a PIR: Gather materials: You will need a PIR sensor module, a relay module, a power supply, a microcontroller, and the electrical appliance you want to control. Connect the PIR sensor: Connect the PIR sensor to the microcontroller according to the manufacturer's instructions. Depending on the type of sensor you're using, you may need to connect wires or use a breadboard. Connect the relay module: Connect the relay module to the microcontroller according to the manufacturer's instructions. You'll need to connect wires to the relay module to control the electrical appliance. Write code: Write code in a programming language such as Python or C++ to control the relay based on the output from the PIR sensor. You'll need to use a library or driver for your specific sensor and relay module to communicate with them and control the electrical appliance. Test the circuit: Test the circuit by triggering the PIR sensor and making sure the relay turns on and off the electrical appliance as expected. Mount the circuit: Mount the circuit in a suitable enclosure or on a circuit board. By following these steps, you can assemble a relay with a PIR sensor and control electrical appliances based on motion detection. This can be useful for a wide range of applications, such as controlling lights or fans in a room or hallway, or activating security alarms or cameras when motion is detected.
A pulse sensor is a device that measures the heart rate and provides an output signal that can be read by a microcontroller. Here are the steps to use a pulse sensor and access analog data: Choose your pulse sensor: Choose a pulse sensor that meets your requirements for accuracy, sensitivity, and compatibility with your microcontroller. Some popular pulse sensors include the MAX30102 and the PulseSensor Amped. Connect your pulse sensor: Connect your pulse sensor to your microcontroller according to the manufacturer's instructions. Depending on the type of sensor you're using, you may need to connect wires or use a breadboard. Write code to read pulse sensor data: Write code in a programming language such as Python or C++ to read the data from your pulse sensor. You'll need to use a library or driver for your specific sensor to communicate with it and obtain the heart rate reading. Access analog data: To access analog data from your sensor, you'll need to use the analog-to-digital converter (ADC) on your microcontroller. The ADC converts the analog signal from your sensor into a digital signal that can be processed by the microcontroller. You'll need to configure the ADC to read the analog input from your sensor and convert it into a digital value that you can use in your code. Visualize the pulse data: Use a display module, such as an LCD display or OLED display, to visualize the heart rate data. You can use the digital output from your pulse sensor to create a visual representation of the heart rate, such as a bar graph or a line chart. Test and calibrate your setup: Test your pulse sensor to make sure it is accurate and reliable. If necessary, calibrate your sensor or adjust your code to improve the accuracy of your heart rate readings. By following these steps, you can use a pulse sensor to measure the heart rate and access analog data from your sensor. This can be useful for a wide range of applications, such as monitoring the heart rate of a person, controlling the heart rate of a device or system, or providing feedback on the heart rate of a process.
A temperature sensor is a device that measures temperature and provides an output signal that can be read by a microcontroller. Here are the steps to use a temperature sensor: Choose your temperature sensor: Choose a temperature sensor that meets your requirements for accuracy, resolution, and range. Some popular temperature sensors include thermistors, thermocouples, and RTDs (resistance temperature detectors). Connect your temperature sensor: Connect your temperature sensor to your microcontroller according to the manufacturer's instructions. Depending on the type of sensor you're using, you may need to connect wires or use a breadboard. Write code to read temperature: Write code in a programming language such as Python or C++ to read the temperature from your sensor. You'll need to use a library or driver for your specific sensor to communicate with it and obtain the temperature reading. Display the temperature: Use a display module, such as an LCD display or OLED display, to display the temperature on a screen. You can use the analog or digital output from your temperature sensor to create a visual representation of the temperature, such as a bar graph or a needle gauge. Customize the display: You can customize the display to show the temperature in different units, such as Celsius or Fahrenheit, and to format the output in a way that is visually appealing. Test and calibrate your setup: Test your temperature sensor to make sure it is accurate and reliable. If necessary, calibrate your sensor or adjust your code to improve the accuracy of your temperature readings. By following these steps, you can use a temperature sensor to measure temperature and display it on a screen. This can be useful for a wide range of applications, such as monitoring the temperature of a room or a device, controlling the temperature of a system, or providing feedback on the temperature of a process.
A stepper motor is a type of motor that moves in precise, incremental steps. Here are the steps to configure a stepper motor: Choose your stepper motor: Choose a stepper motor that meets your requirements for torque, speed, and accuracy. Stepper motors come in different sizes and shapes, and some are better suited for specific applications than others. Choose your driver: Choose a stepper motor driver that is compatible with your stepper motor and meets your requirements for current, voltage, and control method. Stepper motor drivers come in different types, such as bipolar and unipolar, and some are designed for specific microcontrollers or operating systems. Connect your stepper motor and driver: Connect your stepper motor and driver according to the manufacturer's instructions. Depending on the type of motor and driver you're using, you may need to connect wires or use a breadboard. Write code to control the motor: Write code in a programming language such as Python or C++ to control the movement of your stepper motor. You'll need to use a library or driver for your specific motor and driver to communicate with them and control the movement of the motor. Test and calibrate your setup: Test your stepper motor to make sure it is moving in the desired way and that it is accurate and reliable. If necessary, calibrate your motor or adjust your code to improve the accuracy of the movement. By following these steps, you can configure a stepper motor to move in precise, incremental steps. This can be useful for a wide range of applications, such as robotics, CNC machines, and 3D printers.
A temperature gauge is a device that displays the current temperature of a system. Here are the steps to create a temperature gauge using a microcontroller and a temperature sensor: Choose your microcontroller: Choose a microcontroller that is compatible with your temperature sensor and meets your requirements for processing power, memory, and input/output capabilities. Some popular microcontrollers for temperature sensing include Arduino, Raspberry Pi, and ESP8266. Choose your temperature sensor: Choose a temperature sensor that is compatible with your microcontroller and meets your requirements for accuracy, resolution, and range. Some popular temperature sensors include thermistors, thermocouples, and RTDs (resistance temperature detectors). Connect your temperature sensor: Connect your temperature sensor to your microcontroller according to the manufacturer's instructions. Depending on the type of sensor you're using, you may need to connect wires or use a breadboard. Write code to read temperature: Write code in a programming language such as Python or C++ to read the temperature from your sensor. You'll need to use a library or driver for your specific sensor to communicate with it and obtain the temperature reading. Display the temperature: Use a display module, such as an LCD display or OLED display, to display the temperature on a screen. You can use the analog or digital output from your temperature sensor to create a visual representation of the temperature, such as a bar graph or a needle gauge. Customize the display: You can customize the display to show the temperature in different units, such as Celsius or Fahrenheit, and to format the output in a way that is visually appealing. Test and calibrate your setup: Test your temperature gauge to make sure it is accurate and reliable. If necessary, calibrate your sensor or adjust your code to improve the accuracy of your temperature readings. By following these steps, you can create a temperature gauge using a microcontroller and a temperature sensor. This can be useful for monitoring the temperature of a system, such as a greenhouse or a server room, or for providing feedback on the temperature of a device or component.
A display module is an electronic component that is used to display information or graphics on a screen. Display modules can be used in a wide range of applications, such as in electronic devices, industrial control systems, and consumer electronics. Here are the steps to use a display module: Choose your display module: There are many different types of display modules available, including LCD displays, OLED displays, and e-ink displays. Choose a display module that is compatible with your project and meets your requirements for resolution, size, and power consumption. Connect your display module: Connect your display module to your microcontroller or computer according to the manufacturer's instructions. Depending on the type of display module you're using, you may need to connect wires or use a breadboard. Write code to display information: Write code in a programming language such as Python or C++ to display information on your display module. You'll need to use a library or driver for your specific display module to communicate with it and display information. Customize the display: You can customize the display to show different types of information, such as text, graphics, or images. You can also customize the layout and formatting of the information to make it visually appealing. Test and calibrate your setup: Test your display module to make sure it is displaying information correctly and reliably. If necessary, calibrate your display module or adjust your code to improve the accuracy of the information being displayed. By following these steps, you can use a display module to display information or graphics on a screen. This can be useful for a wide range of applications, such as displaying status information, monitoring system parameters, or providing user feedback.
To display temperature on a screen, you'll need a device that is capable of measuring temperature, such as a temperature sensor, and a device that can display the temperature, such as a microcontroller or a computer. Here are the steps to follow: Connect your temperature sensor: Connect your temperature sensor to your microcontroller or computer according to the manufacturer's instructions. Depending on the type of sensor you're using, you may need to connect wires or use a breadboard. Write code to read temperature: Write code in a programming language such as Python or C++ to read the temperature from your sensor. You'll need to use a library or driver for your specific sensor to communicate with it and obtain the temperature reading. Display the temperature: Depending on your setup, you can display the temperature in a variety of ways. For example, you could display it on an LCD screen connected to your microcontroller, on a computer screen using a GUI (graphical user interface) program, or on a web page using a web server. Customize the display: You can customize the display to show the temperature in different units, such as Celsius or Fahrenheit, and to format the output in a way that is visually appealing. Test and calibrate your setup: Test your temperature display to make sure it is accurate and reliable. If necessary, calibrate your sensor or adjust your code to improve the accuracy of your temperature readings. By following these steps, you can display the temperature on a screen using a temperature sensor and a microcontroller or computer. This can be useful for a variety of applications, such as monitoring the temperature in a room, tracking the temperature of a device, or displaying the temperature of a system in real time.
IFTTT (If This Then That) is a web-based service that allows you to create applets (formerly called "recipes") to automate tasks across different web services. Webhooks are a way to connect two different web services together, so that an action in one service can trigger an action in another. Here's how to create a webhook using IFTTT: Sign up for an IFTTT account: Go to the IFTTT website and create an account if you haven't already. Create a new applet: Click on "Create" to start a new applet. Choose your trigger: Choose the "This" option to select the trigger for your webhook. For example, you might choose "Webhooks" as your trigger. Configure your trigger: Depending on the trigger you choose, you may need to enter additional information, such as a URL or key. Choose your action: Choose the "That" option to select the action you want to occur when the trigger is activated. For example, you might choose to receive an email or a notification on your phone. Configure your action: Depending on the action you choose, you may need to enter additional information, such as your email address or phone number. Name your applet: Give your applet a name that describes what it does. Save and activate your applet: Click "Save" to save your applet, then click "Activate" to turn it on. Once you've created your webhook using IFTTT, you can use it to automate a wide range of tasks. For example, you might use it to receive notifications when a particular event occurs on your website, or to trigger an action in one of your other web services when a user submits a form on your site. With IFTTT, the possibilities are endless.
To control lights with Google Voice Command, you'll need a smart home device that is compatible with Google Assistant, such as a Google Home or Google Nest device, and smart lights that are compatible with the same system. Here are the steps to follow: Set up your smart lights: Make sure your smart lights are properly installed and connected to your home Wi-Fi network. You may need to download the manufacturer's app and follow the instructions to get your lights set up. Connect your smart lights to Google Assistant: Open the Google Home app on your mobile device, tap on the "+" icon to add a new device, and follow the prompts to connect your smart lights to Google Assistant. Give your lights a name: Once your smart lights are connected, give them a name that is easy to remember and pronounce. For example, you could call them "Living Room Lights." Test your voice command: Use your Google Assistant device to test your voice command. Say something like, "Hey Google, turn on Living Room Lights." Your lights should turn on if everything is set up correctly. Experiment with different commands: There are many different voice commands you can use to control your smart lights with Google Assistant. For example, you could say, "Hey Google, turn off the lights," or "Hey Google, dim the lights to 50%." Adjust settings: You can also adjust the settings for your smart lights using Google Assistant. For example, you can change the color or brightness of your lights, set a schedule for them to turn on or off, or even create routines that automate multiple actions at once. By following these steps, you can easily control your lights with Google Voice Command, making it a convenient and hands-free way to adjust the lighting in your home.
A reed sensor is a device that detects the presence or absence of a magnetic field. It consists of a pair of ferromagnetic reeds that are hermetically sealed inside a glass tube, with electrical contacts attached to each end of the reeds. Here are the steps to use a reed sensor: Choose your reed sensor: Choose a reed sensor that meets your requirements for sensitivity, durability, and compatibility with your microcontroller. Some popular reed sensors include the RLS-125 and the RLS-3060. Connect your reed sensor: Connect your reed sensor to your microcontroller according to the manufacturer's instructions. Depending on the type of sensor you're using, you may need to connect wires or use a breadboard. Write code to read reed sensor data: Write code in a programming language such as Python or C++ to read the data from your reed sensor. You'll need to use a library or driver for your specific sensor to communicate with it and obtain the status of the reed switch (open or closed). Use the reed sensor: Use the reed sensor to detect the presence or absence of a magnetic field. When a magnetic field is present, the reed switch will close and the microcontroller will detect a change in status. Visualize the reed sensor data: Use a display module, such as an LCD display or OLED display, to visualize the status of the reed sensor. You can use the digital output from your reed sensor to create a visual representation of the magnetic field, such as a bar graph or a line chart. Test and calibrate your setup: Test your reed sensor to make sure it is accurate and reliable. If necessary, calibrate your sensor or adjust your code to improve the accuracy of your readings. By following these steps, you can use a reed sensor to detect the presence or absence of a magnetic field and visualize the data using a display module. This can be useful for a wide range of applications, such as detecting the position of a door or window, monitoring the status of a machine or system, or measuring the strength of a magnetic field.
A 16-channel touch module is a device that allows you to detect touch or proximity on up to 16 different touchpoints. Here are the steps to use a 16-channel touch module: Choose your touch module: Choose a touch module that meets your requirements for sensitivity, durability, and compatibility with your microcontroller. Some popular touch modules include the TTP224 and the MPR121. Connect your touch module: Connect your touch module to your microcontroller according to the manufacturer's instructions. Depending on the type of module you're using, you may need to connect wires or use a breadboard. Write code to read touch data: Write code in a programming language such as Python or C++ to read the data from your touch module. You'll need to use a library or driver for your specific module to communicate with it and obtain the status of the touchpoints (touched or untouched). Use the touch module: Use the touch module to detect touch or proximity on up to 16 different touchpoints. When a touch is detected, the microcontroller will detect a change in status. Respond to touch events: Use the digital output from your touch module to respond to touch events. For example, you could use the touch module to control the brightness or color of an LED strip, or to trigger a sound effect or animation. Test and calibrate your setup: Test your touch module to make sure it is accurate and reliable. If necessary, calibrate your module or adjust your code to improve the accuracy of your readings. By following these steps, you can use a 16-channel touch module to detect touch or proximity on up to 16 different touchpoints and respond to touch events. This can be useful for a wide range of applications, such as creating interactive installations or displays, controlling multimedia or gaming applications, or implementing touch-based user interfaces for devices or machines.
Creating a server manually involves setting up a computer or device to act as a server and configuring it to serve web pages or other resources to clients on a network or the internet. Here are the steps to create a server manually: Choose your server hardware: Choose a computer or device that meets your requirements for performance, reliability, and connectivity. Depending on your needs, you may want to use a dedicated server, a virtual private server (VPS), or a Raspberry Pi or similar device. Choose your server software: Choose a server software that meets your requirements for functionality, ease of use, and compatibility with your hardware and operating system. Some popular server software includes Apache, Nginx, and Microsoft IIS. Install and configure your server software: Install your chosen server software on your hardware and configure it according to the software's documentation. You'll need to set up your server to serve web pages or other resources, configure security settings, and set up any necessary protocols or services, such as FTP or SSH. Set up your domain name: If you want to serve your content over the internet, you'll need to register a domain name and configure your server to respond to requests for that domain. You can use a domain registrar such as GoDaddy or Namecheap to register your domain and set up DNS records to point to your server's IP address. Test and optimize your server: Test your server to make sure it is accessible and responsive, and optimize your configuration to improve performance and security. You may want to use tools such as Apache Bench or Google PageSpeed Insights to test and optimize your server's performance. By following these steps, you can create a server manually and serve web pages or other resources to clients on a network or the internet. This can be useful for a wide range of applications, such as hosting a website, providing remote access to files or applications, or building custom services or applications.
Assembling a toy car is a fun and engaging activity that can help develop hand-eye coordination, problem-solving skills, and spatial awareness. Here are the steps to assemble a basic toy car: Gather your materials: Collect all the materials you need to build your toy car. This may include a pre-made car chassis or frame, wheels, axles, a motor, a battery, and any other accessories or decorations you want to add. Attach the wheels: Attach the wheels to the axles and then attach the axles to the chassis. Make sure the wheels spin freely and are aligned properly. Install the motor: If your car has a motor, install it according to the manufacturer's instructions. You may need to connect wires, install gears or pulleys, or mount the motor in a specific location. Connect the battery: Connect the battery to the motor and any other electronics or components that require power. Make sure the battery is securely mounted and the wiring is neat and organized. Test your car: Test your car to make sure it runs smoothly and all the components work properly. You may want to adjust the motor or wheels, add weight or balance the car to improve performance. Add decorations and accessories: Once your car is running smoothly, add any decorations or accessories you want to personalize your car. You can use paint, stickers, or other materials to customize the look of your car. By following these steps, you can assemble a basic toy car and customize it to your liking. This can be a fun and engaging activity for children or adults, and can be used to teach basic principles of mechanics, electronics, and design.
An H-bridge module is an electronic circuit that is used to control the direction and speed of a motor. It is called an H-bridge because it consists of four switching elements arranged in an H shape. The switching elements are usually transistors or MOSFETs, and they are controlled by a microcontroller or other signal source. The H-bridge module has two input pins that control the direction of the motor. By applying a voltage to one input and grounding the other, the motor will spin in one direction. By reversing the voltage and grounding the other input, the motor will spin in the opposite direction. The H-bridge module also has a PWM (pulse width modulation) input that controls the speed of the motor. By varying the duty cycle of the PWM signal, the speed of the motor can be increased or decreased. The H-bridge module is used in a wide range of applications, including robotics, automation, and motor control. It is commonly used to control the speed and direction of DC motors, but it can also be used with other types of motors, such as stepper motors. Overall, the H-bridge module is a versatile and essential component in many electronic systems, providing precise control over the direction and speed of motors.
Connecting an H-bridge module to a motor is a fairly simple process, and can be done using the following steps: Gather your materials: You will need an H-bridge module, a motor, a power supply, and a microcontroller or other signal source to control the H-bridge. Connect the power supply: Connect the positive and negative terminals of your power supply to the VCC and GND pins on the H-bridge module. Make sure the voltage of the power supply is within the specified range of the H-bridge module. Connect the motor: Connect the positive and negative terminals of the motor to the OUT1 and OUT2 pins on the H-bridge module. Make sure the motor is wired correctly and spins freely. Connect the signal source: Connect the signal source to the IN1, IN2, and PWM pins on the H-bridge module. These pins control the direction and speed of the motor. Test the connection: Test the connection by applying a signal to the IN1 and IN2 pins to control the direction of the motor. Then, apply a PWM signal to the PWM pin to control the speed of the motor. Fine-tune the connection: Fine-tune the connection by adjusting the duty cycle and frequency of the PWM signal to achieve the desired speed and responsiveness of the motor. By following these steps, you can easily connect an H-bridge module to a motor and control its direction and speed with a microcontroller or other signal source. It's important to follow the manufacturer's instructions and specifications for the H-bridge module and motor, and to test the connection carefully before using it in a larger project.
Playing with a self-made car can be a fun and educational experience, and there are many ways to customize and improve the car to make it more interesting and functional. Here are a few ideas for playing with a self-made car: Experiment with different motors: Try using different types of motors, such as DC motors or stepper motors, to see how they affect the performance of the car. You can also try varying the voltage and current supplied to the motor to see how it affects the speed and torque of the car. Add sensors and controls: Adding sensors such as a light sensor or a temperature sensor can allow the car to react to its environment. You can also add controls such as a joystick or a remote control to give you more control over the car. Customize the body: Use your creativity to customize the body of the car with paint, stickers, or other decorations. You can also experiment with different materials, such as cardboard, plastic, or metal, to see how they affect the weight and durability of the car. Build obstacles and tracks: Create a course or obstacles for the car to navigate, such as ramps, tunnels, or mazes. You can also build a track for the car to follow using markers or tape. Collaborate with others: Work with friends or family members to build and race multiple cars. You can also organize competitions or challenges to see whose car is fastest or can navigate obstacles the best. Playing with a self-made car is a great way to learn about electronics, mechanics, and physics, while also having fun and being creative. Don't be afraid to experiment and try new things to make your car even better!
Using a Raspberry Pi can be a fun and rewarding experience, and there are many projects you can undertake with this versatile device. Here are a few ideas for using a Raspberry Pi: Media center: Use your Raspberry Pi to set up a media center that can play movies, music, and other digital media on your TV or monitor. You can use software like Kodi or Plex to organize and stream your media files. Retro gaming console: Turn your Raspberry Pi into a retro gaming console by installing software like RetroPie or Lakka. These programs allow you to play classic games from consoles like the NES, SNES, and Sega Genesis. Home automation: Use your Raspberry Pi to control smart home devices like lights, thermostats, and security systems. You can use software like Home Assistant or OpenHAB to set up a home automation system that is tailored to your needs. Robotics: Use your Raspberry Pi to control robots and other mechanical devices. You can use programming languages like Python or Scratch to create custom programs that control the movement and behavior of your robots. Web server: Set up a web server on your Raspberry Pi to host your own website or web application. You can use software like Apache or Nginx to serve web pages, and tools like Flask or Django to create dynamic web applications. These are just a few ideas for using a Raspberry Pi, but the possibilities are almost endless. Whether you are interested in programming, electronics, or just tinkering with technology, the Raspberry Pi offers a wide range of possibilities for experimentation and creativity.
Face detection on Raspberry Pi is a popular project that involves using computer vision techniques to detect human faces in images or video streams captured by a camera connected to the Raspberry Pi. Here are the general steps involved in implementing face detection on Raspberry Pi: Install OpenCV: OpenCV is a popular computer vision library that provides tools for image and video processing. It can be installed on the Raspberry Pi using the apt package manager or by building from source. Connect a camera: Connect a camera module to the Raspberry Pi using the camera port or a USB camera. Raspberry Pi camera modules are recommended for optimal performance and ease of use. Capture frames: Use the camera module to capture frames from the video stream. The frames are stored as images in memory or on disk. Preprocess frames: Apply preprocessing techniques such as resizing, cropping, and filtering to the captured frames to prepare them for face detection. Detect faces: Use OpenCV's face detection algorithms to detect human faces in the preprocessed frames. This involves training a model to recognize facial features and using it to identify faces in the image. Display or save results: Display the results of the face detection algorithm on a screen connected to the Raspberry Pi or save them to disk for later use. Face detection on Raspberry Pi can be a fun and challenging project that combines computer vision, image processing, and hardware programming skills. It has many potential applications in fields such as surveillance, security, and human-computer interaction.
The learning outcomes of working with Raspberry Pi can vary depending on the specific projects and tasks undertaken. However, some common learning outcomes include: Understanding of basic programming concepts: Raspberry Pi programming often involves using programming languages like Python or C++ to control hardware components and process data. This can help learners develop a foundational understanding of programming concepts such as variables, functions, and control structures. Hands-on experience with hardware: Working with Raspberry Pi involves connecting and controlling hardware components such as sensors, motors, and cameras. This can help learners develop practical skills in electronics and hardware programming. Familiarity with Linux operating system: Raspberry Pi runs on the Linux operating system, which can provide learners with exposure to the command line interface and the basics of Linux administration. Experience with computer vision and machine learning: Many Raspberry Pi projects involve using computer vision techniques and machine learning algorithms to process images and videos. This can provide learners with an introduction to these fields and their applications. Creativity and problem-solving skills: Raspberry Pi projects often involve designing and implementing creative solutions to real-world problems. This can help learners develop critical thinking, problem-solving, and innovation skills. Overall, working with Raspberry Pi can provide learners with a broad range of technical and soft skills, as well as a platform for exploring their interests and pursuing their passions.

Course Reviews:

Average Rating 0
0 Ratings
Details
5 Stars 0
4 Stars 0
3 Stars 0
2 Stars 0
1 Stars 0

No reviews yet.

Also available in Bundles